Calving Season Prep Checklist: Be Ready Before the Vet Arrives
By FarmVetGuide Editorial Team · Published January 2026 · Updated February 2026 · Based on verified data from our directory of 9,500+ practices
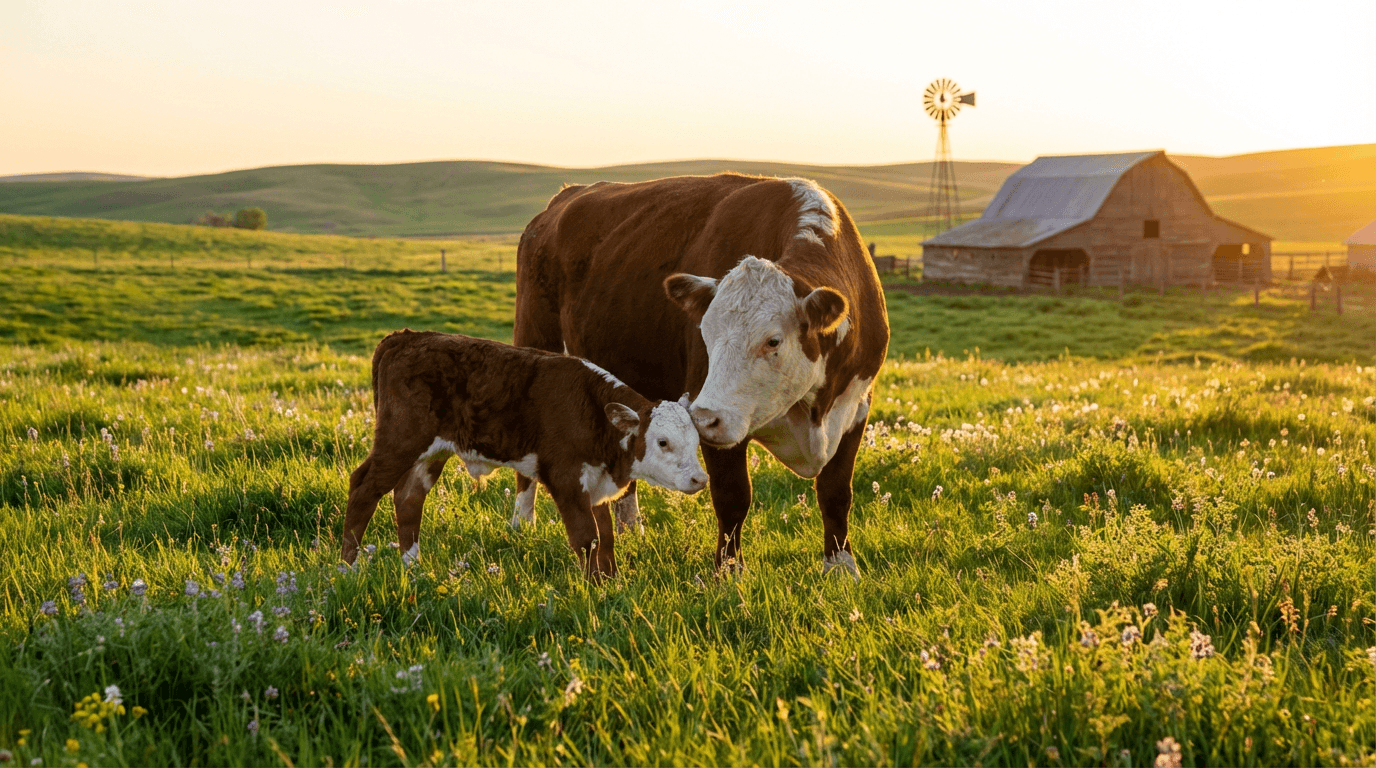
Calving season is simultaneously the most rewarding and most demanding stretch of the ranching year. Every cow that delivers a healthy calf and every calf that makes it to a strong first nursing represents months of nutritional management, reproductive planning, and infrastructure investment paying off. But calving is also where things go wrong fast — a malpresented calf, a first-calf heifer in prolonged labor, a weak calf that misses the colostrum window, a cow with a retained placenta that turns septic. This calving season checklist gives you the tools to handle every stage of the calving process, recognize complications early, and make the right call on when to reach for the OB chains yourself and when to pick up the phone and call your large animal vet.
Pre-Calving Preparation: Start 60 Days Out
The mistakes that cost calves during calving season are usually made in November and December, not in February. Cows that enter the last trimester thin, nutritionally deficient, or not properly vaccinated produce weaker calves and less colostrum, and they are harder to rebreed after calving. Starting your checklist 60 days before the first expected calving date gives you time to fix problems while you still can.
Body Condition Scoring and Nutrition (60 Days Out)
- Target BCS at calving: Beef cows should calve at BCS 5–6 (scale of 1–9). BCS 4 or below at calving is associated with significantly reduced colostrum production, increased calving difficulty, and delayed return to estrus after calving (directly hurting next year's calf crop).
- Thin cows: Adding one BCS unit requires approximately 80–100 lb of weight gain. In the last trimester, the fetus accounts for most of a cow's nutrient demand — thin cows need supplemental energy, not just hay. Consult your county extension agent or a nutritionist for a cost-effective supplementation plan.
- Protein supplementation: Cows on dormant winter pasture or low-quality hay (below 7% crude protein) benefit from protein supplementation (cottonseed cake, range cubes, liquid protein supplements). Adequate rumen-degradable protein is essential for fiber digestion efficiency.
- Trace minerals: Selenium deficiency causes white muscle disease in calves and reduced immune function. Copper deficiency impairs immune response and reproductive performance. Have your hay and/or blood tested before assuming your mineral program is adequate.
Vaccination (4–6 Weeks Before Calving)
- Scours vaccine (rotavirus, coronavirus, E. coli K99, Clostridium perfringens C&D): Must be given 3–6 weeks pre-calving to allow adequate colostral antibody transfer. If given too close to calving, the cow does not have time to concentrate antibodies in colostrum.
- BRD 5-way booster: Killed vaccine or MLV labeled safe for pregnant cattle.
- Clostridial (7-way/8-way) booster: Annual pre-calving booster elevates colostral antibodies against clostridial toxins, protecting calves through the passive immunity they receive from colostrum.
- See the complete vaccination timing guide in Complete Cattle Vaccination Schedule for details.
Facilities Preparation (30 Days Out)
- Calving barn/lot: Clean out accumulated manure from the previous year. Bacterial load from previous calving seasons (especially Cryptosporidium, E. coli, and rotavirus) accumulates in soil and bedding and is a primary source of scours in young calves. Lime the ground and add fresh bedding.
- Calving pens: Individual pens measuring at least 12×14 feet allow observation and intervention without crowding. Plan for 10–15% of your herd size in calving pens at any one time (more if calving is compressed into a 45-day window).
- Lighting: Nighttime calvings are more common than daytime births (cows prefer the perceived safety of darkness). Adequate lighting is essential for intervention work.
- Heat and electricity: Access to a heat lamp or warming box is critical in cold climates. The power outlet must be accessible without opening a gate that a cow can escape through.
- Water and feed access: Cows in calving pens should have ad libitum water and hay available at all times. A cow in labor that goes more than 12 hours without water or feed is already stressed before the delivery challenge begins.
- Chute and headgate: Must be functional and well-maintained before calving season. You will use it for retained placenta treatment, mastitis diagnosis, and difficult birth assistance. A stuck headgate at 2 AM in February is a genuine emergency.
Supplies Checklist (2 Weeks Out)
Inventory and restock the following before the first calf hits the ground:
- OB chains (2–3 sets) or OB straps — inspected for cracks or weak links
- OB handles (2) — T-bar style or quick-release depending on your preference
- Calf puller (mechanical fetal extractor) — lubricated and tested
- OB lubricant (obstetrical lubricant, not petroleum-based) — minimum 2 gallons
- OB sleeves (long OB gloves) — minimum 50 per hundred cows expected
- 7% tincture of iodine for navel dipping — enough for every calf
- Small cup or navel dipper for iodine application
- Colostrum replacer (not supplement) — commercial bovine colostrum replacer with >100g IgG per dose
- Esophageal tube feeder (calf tube) and 60cc syringe
- Nipple bottles and extra nipples
- Brix refractometer for colostrum quality testing (target ≥22% Brix)
- Oral electrolyte solutions (at least 20–30 doses) — for treating scours
- Rectal thermometer (normal calf temp: 101–103°F)
- Flashlight / headlamp with fresh batteries
- Warming box or heat lamps for hypothermic calves
- Ear tags and applicator (size appropriate for neonatal calves)
- Record-keeping notebook or tablet
- Your large animal vet's number — primary and after-hours emergency
If you need to locate a vet before calving season starts, use FarmVetGuide's cattle vet directory and confirm they provide emergency and after-hours service. Many counties have only one or two large animal vets — establish the relationship now, not at 11 PM when a heifer has been in stage 2 labor for 3 hours.
Signs of Impending Calving: What to Watch For
Recognizing pre-calving signs helps you time your checks appropriately and avoid missing the critical window for intervention. Most signs appear 12–72 hours before calving, but individual variation is significant.
Udder Development (Bagging Up)
In beef cows, significant udder enlargement (bagging) typically begins 2–4 weeks before calving. By 48–72 hours pre-calving, the udder is usually tense, distended, and may be leaking colostrum from the teat ends. Heifers often bag more dramatically and earlier than older cows. A cow that is full of milk but shows no other signs of impending labor is probably within 48 hours of calving.
Relaxation of the Tailhead Ligaments
The sacrotuberous and sacroischial ligaments on either side of the tailhead relax dramatically in the 12–24 hours before calving under the influence of relaxin and estrogen. Place your thumb and forefinger on either side of the tailhead and press inward — a soft, sunken appearance replaces the firm, ropy feel of normal ligaments. This is the most reliable clinical sign of imminent parturition. Some experienced stockmen can predict calving within 2–4 hours using this sign combined with vulvar changes.
Vulvar Changes
- Vulvar edema and elongation begin 2–4 weeks before calving as the cow's pelvic ligaments relax and the birth canal prepares.
- A clear-to-white mucous discharge from the vulva (discharge of the cervical seal) typically occurs 24–48 hours before calving — this is normal and expected.
- A bloody or red-tinged mucous strand is also normal immediately before or during early labor.
- If you see a large amount of bright red blood or thick, purulent (pus-like) discharge, call your vet — these are not normal.
Behavioral Changes
- Separation from the herd, seeking isolation
- Restlessness: getting up and lying down repeatedly, turning to look at her flank, kicking at her belly
- Loss of appetite 12–24 hours before active labor
- Repeated rising and lying in a first-calf heifer with no progress: always investigate — she may be too uncomfortable to express visible straining
Stage 1 Labor: Early Labor
Stage 1 labor begins with the onset of uterine contractions and ends with complete dilation of the cervix. The cow may appear mildly uncomfortable — repeatedly lying down and rising, tail switching, some straining — but visible progress toward delivery is minimal.
Normal Stage 1 Duration
- Cows (2nd calf and older): 2–6 hours is typical. Many experienced cows show minimal outward signs during stage 1.
- First-calf heifers: 2–12 hours is within normal range. Heifers often show more obvious discomfort and may appear more distressed than their cervical dilation would warrant.
What Not to Do During Stage 1
The most common mistake during stage 1 is premature intervention. A cow that is in stage 1 labor, contracting normally, and showing appropriate discomfort does not need assistance. Premature vaginal examination risks introducing infection and disrupts the normal progression of labor. Excessive human presence and disturbance can delay cervical dilation in a heifer that is nervous or stressed. Observe quietly from a distance — if you can see the flank from the barn aisle or through a camera, there is no need to enter the pen yet.
When Stage 1 Is Too Long
- More than 6 hours of visible straining in a cow with no progress
- More than 12 hours in a heifer with no water sac or calf parts visible
- Visible signs of pain disproportionate to progress: cow throwing herself against fences, violent uncontrolled straining, continuous bellowing
- Cow down and unable to rise during stage 1 (suggests hypocalcemia / milk fever, or a problem position of the calf)
Stage 2 Labor: Active Delivery
Stage 2 begins when the calf enters the birth canal (visible as the water sac or calf's feet at the vulva) and ends with delivery of the calf. Strong, rhythmic abdominal contractions are now visible from outside the pen.
Normal Presentation and Progress
- Normal position: Both front feet first, soles pointing down, with the nose resting on the pasterns — described as "diving position." The nose follows within minutes of the feet appearing.
- Normal timeline in a cow: Water sac appears, breaks → two front feet visible → nose and head → shoulders → delivery of calf. Total stage 2: 30 minutes to 2 hours.
- Normal timeline in a heifer: Up to 4 hours of active straining, but the calf should be making steady progress. If you can see the feet and head but nothing is moving for 30 minutes of hard straining, assess the situation.
When to Intervene in Stage 2
The general guideline: if you can see the water sac or calf parts and no progress is being made after 30–60 minutes of active straining, it is time to perform a vaginal examination and determine whether assistance is needed.
Before performing a vaginal examination:
- Restrain the cow (headgate, or halter tied to a fixed point with enough slack to lie down)
- Thoroughly wash hands and arms with soap and water
- Put on an OB sleeve over a clean examination glove
- Apply generous amounts of OB lubricant
- Gently enter the vagina and assess: cervical dilation, calf position, whether the water sac is intact
Applying OB Chains and Calf Puller: Step-by-Step
If the calf is in normal anterior presentation but assistance is needed due to size or a tight heifer pelvis:
- Apply OB chains: Place the chain loop above the fetlock joint (pastern) and a half-hitch below the fetlock. The half-hitch below the fetlock distributes tension and greatly reduces the risk of leg fractures during assisted delivery.
- Manual traction first: Before using a mechanical calf puller, apply steady manual traction during contractions, pulling at a downward angle (toward the cow's hocks, not straight back). Work with contractions, not against them. Two strong adults can safely apply reasonable traction manually.
- Calf puller (mechanical fetal extractor): Use when manual traction is insufficient. Position the crossbar against the cow's pelvis (not her vulva — this causes serious lacerations). Apply traction slowly and steadily during contractions. The puller amplifies force significantly — excessive force can fracture the calf's legs or cause severe maternal injury. If you are applying maximum puller tension and the calf is not moving, stop and call your vet immediately. This situation requires professional assessment for a fetotomy or C-section.
- Once the head clears: Stop, allow the cow a contraction or two, then apply moderate downward traction to help the shoulders past the pelvis. Once past the shoulders, the rest of the calf typically delivers quickly.
Abnormal Presentations: Recognize and Respond
- One leg back: One front leg is retained inside the uterus while the other is at the vulva. Do not pull — you will fracture the retained leg against the brim of the pelvis. Cup the retained foot in your palm, flex the knee and elbow, and guide the foot forward into the birth canal.
- Head turned back (wry neck): Both feet present but no head at the vulva. Push the calf slightly back to create room, cup the chin and nose in your hand, and guide the head into the birth canal.
- Breech (hind end first, legs up under the abdomen): The tail or hocks appear at the vulva. This is a true obstetric emergency — the calf's umbilicus is compressed by the birth canal before it can breathe, meaning the calf is already hypoxic. Speed is critical. Reach in and flex the hind legs, bringing the hocks and then the fetlocks into the birth canal — use generous lubrication. Once hind legs are out, apply rapid but controlled traction. Call your vet if you cannot complete repositioning within 5 minutes.
- Ringwomb (incomplete cervical dilation): The water sac or feet appear at an opening smaller than a fist, and the opening does not dilate despite contractions. Do not force traction — you will rupture the cervix. Call your large animal vet immediately for muscle relaxants (Clenbuterol) or other obstetric management.
- Twins: If delivery seems prolonged after a normal first calf, feel for a second calf before the uterus contracts down. A second calf missed in examination can result in the uterus clamping down on it — serious maternal complication.
- Hip lock: The calf's head and shoulders have delivered but the hips are stuck at the pelvic brim. Rotate the calf 45 degrees in either direction — this shifts the point of widest diameter of the calf's pelvis relative to the cow's pelvis and allows delivery. Apply steady traction at the same time.
For complex presentations, or any situation where you are not making progress after 20–30 minutes of obstetric work, call your large animal vet without delay. Every minute of delay in a true dystocia increases calf mortality and maternal morbidity. Read When to Call the Vet for Cattle Emergencies for a full guide to recognizing situations that require immediate professional help. Use FarmVetGuide's emergency vet locator to find after-hours coverage in your area.
Stage 3: Placenta Passage
Stage 3 labor is the passage of the placenta (afterbirth). In cattle, the cotyledonary placenta is tightly attached to the uterine caruncles and requires an active maternal release process.
Normal Placenta Passage
- Placenta should be passed within 8–12 hours of calving in most cows.
- Do not pull the placenta out manually — this tears the caruncles and causes hemorrhage and serious uterine damage. If part of the placenta is hanging from the vulva, tie it in a knot above the hocks to prevent the cow from stepping on it.
Retained Placenta
A placenta not passed by 12–24 hours is considered retained. Retained placenta occurs in 5–15% of calvings and is more common after dystocia, induced calving, twins, hypocalcemia (milk fever), selenium/vitamin E deficiency, and premature births.
- Mild cases: Placenta passed by 24–48 hours with no fever and normal behavior — monitor closely, ensure adequate feed and water.
- Treatment indication: Fever (>104°F), depression, reduced feed intake, or foul-smelling discharge after placenta is retained more than 24 hours — call your veterinarian. Intrauterine antibiotic therapy and/or systemic antibiotics may be indicated.
- Manual removal (under vet guidance only): Current evidence does not support routine manual removal of retained placentas — it worsens outcomes in most cases. If your vet recommends it, they will do it themselves or instruct you specifically on technique.
Newborn Calf Care: The Critical First Hour
The first 60 minutes after birth are the most important of a calf's life. Actions taken or missed in this window determine whether the calf thrives or struggles for weeks.
Clearing the Airway
As soon as the calf is delivered, clear the nostrils and mouth of membranes if the cow is not doing so immediately. Stimulate breathing by rubbing vigorously with a dry towel, especially over the ribs and back. If the calf is not breathing within 30 seconds:
- Elevate the calf's hindquarters briefly (hold it upside down for no more than 10–15 seconds — any longer and abdominal organs compress the diaphragm).
- Insert a clean piece of straw into the nostril to stimulate a sneeze reflex.
- If still not breathing: mouth-to-nose resuscitation. Cover the lower nostril and the calf's mouth with your hand, and breathe firmly into the upper nostril. 20–30 breaths per minute. Continue until the calf breathes on its own or for at least 5 minutes.
Navel Dipping
Dip the navel cord in 7% tincture of iodine within the first 15 minutes of birth, and again at 6–12 hours. Navel ill (E. coli, Arcanobacterium pyogenes, and other bacteria) is a leading cause of septicemia and death in calves under 2 weeks old. The navel is an open port to the bloodstream until it dries and seals. Use a small cup or specific navel dipper — submerge the entire cord, not just the tip.
Helping the Calf Stand
Most calves from normal births will make their first standing attempt within 15–30 minutes and should be standing within 1 hour. A calf that cannot stand after 2 hours needs evaluation — possible causes include hypoglycemia (prolonged dystocia), hypothermia, white muscle disease (selenium deficiency), fractured limb from difficult delivery, or neurological injury.
Colostrum Management: The Most Critical Single Act
Calves are born with essentially no circulating antibodies — their immune protection for the first weeks of life depends entirely on immunoglobulins (IgG) absorbed from colostrum. This passive immunity transfer has a narrow window: the absorptive cells of the calf's gut close down rapidly after birth, with absorption efficiency dropping by approximately 50% by 6 hours of age and approaching zero by 24 hours.
The 1-2-3 Rule of Colostrum Management
- 1st milking colostrum is the most antibody-rich — use it, not later milkings.
- 2 quarts (4 liters) is the minimum amount a calf needs in the first 4 hours of life.
- 3 hours is your target window to confirm the calf has nursed or been tube-fed.
Checking Colostrum Quality with a Brix Refractometer
Not all colostrum is created equal. Cows that bagged up weeks early and leaked colostrum may have poor-quality colostrum at calving. Check with a Brix refractometer:
- ≥22% Brix: Excellent colostrum — proceed with normal nursing or tube feeding.
- 18–22% Brix: Acceptable — supplement with commercial colostrum replacer to boost total IgG dose.
- Below 18% Brix: Poor colostrum — use commercial bovine colostrum replacer (not supplement) providing at least 100g IgG per dose.
Tube Feeding Calves
If the calf has not nursed successfully within 2–3 hours, tube feed. Do not wait for the calf to nurse on its own if it is weak, cold, or uncoordinated. The esophageal tube feeder is passed over the tongue, down the back of the throat, and into the esophagus — resistance is felt if you pass it into the trachea (which you should not). Confirm placement by feeling for the tube in the esophagus (left side of neck) and blowing gently into the tube end — if you can blow freely, it is in the trachea; reposition. Administer 2 quarts slowly — if you see regurgitation, stop and reposition the calf.
When to Use Colostrum Replacer
- Dam died at or before calving
- Dam rejects the calf
- Dam has mastitis or agalactia (no milk)
- Brix below 18%
- Dam received pre-calving vaccinations and you need to verify the specific products — some commercial colostrum replacers also contain clostridial and respiratory antibodies
Use colostrum replacer (not supplement) — replacers provide a full immunoglobulin dose (100+ grams IgG per dose); supplements only top up what the calf already received. Store frozen replacer in your calving barn for emergencies — it keeps for years at -20°C and can be thawed in warm water in 20–30 minutes.
Hypothermia in Calves: Recognition and Treatment
Hypothermia (core body temperature below 100°F) is a leading killer of newborn calves in cold climates. A wet newborn calf in 20°F weather with wind can drop to critically low temperatures in under 30 minutes.
Assessment by Temperature
- Normal (101–103°F): No intervention needed for temperature.
- Mild hypothermia (99–101°F): Dry the calf thoroughly, apply heat lamp, ensure it nurses warm colostrum. Warm the calf's environment.
- Moderate hypothermia (96–99°F): Bring inside. Warm with heat lamp and warm-water bath (100°F bath, submerge to neck). Tube-feed warm colostrum or electrolytes at 39°C. Do not give milk to a cold calf — gut motility is suppressed and aspiration pneumonia risk is high.
- Severe hypothermia (below 96°F): Medical emergency. Intraperitoneal or IV dextrose in addition to external warming may be needed. Call your vet. Calves in this category often have acidosis from prolonged dystocia compounding the hypothermia.
Warming Box Design
A warming box can be as simple as a plywood box large enough for a calf to lie down, with heat lamps or a forced-air heater. Key design features:
- Thermometer mounted inside — target 90–100°F inside the box for a wet, cold calf; reduce to 75–80°F once dry
- Wire mesh flooring over a drip pan (keeps calf off wet bedding)
- Access door large enough to lift a calf in and out easily
- Never leave a calf in a warming box unattended for more than 30 minutes at a time — overheating can be as dangerous as cold
Scours Prevention and Management
Neonatal calf diarrhea (scours) is the leading cause of death in calves under 1 month of age in the United States. The main pathogens are rotavirus, coronavirus, Cryptosporidium parvum, and E. coli (K99 strains), often acting in combination. Despite the infectious etiology, death is almost always from dehydration and acidosis — not from the infection itself. A calf that is scouring vigorously but remains bright, alert, and able to stand has a very good prognosis if treated aggressively with oral electrolytes.
Prevention Strategy
- Pre-calving vaccination: Scours vaccines administered 4–6 weeks before calving boost antibodies in colostrum against rotavirus, coronavirus, and E. coli K99.
- Colostrum management: Adequate passive transfer is the single most important scours prevention tool — calves with low IgG levels (failure of passive transfer) are dramatically more susceptible to all enteric and respiratory pathogens.
- Hygiene and calving area management: Rotate calving areas if possible (Sandhills Calving System). Keep bedding dry and clean. Remove calves and cows from contaminated areas as quickly as feasible.
- Pathogen load reduction: Deep cleaning and liming calving barn pre-season dramatically reduces Cryptosporidium oocyst and rotavirus particle load in the environment.
Oral Electrolyte Treatment
- Start oral electrolytes at the first sign of loose stool in a calf that is still standing and nursing.
- Do not stop milk — calves need the calories from milk to recover. Feed electrolytes at a separate feeding (not mixed with milk) or feed electrolytes and milk at the same time, depending on the product label.
- A calf that is too weak to stand, too depressed to suck, or showing sunken eyes and skin tenting (signs of >8% dehydration) needs IV fluids — call your vet.
- Never give oral electrolytes to a calf that cannot swallow. Aspiration pneumonia will be fatal.
Calf Identification and Record Keeping
Recording accurate parentage and birth information during calving season pays dividends for the rest of the calf's life: for health records, performance data, and culling decisions.
What to Record at Birth
- Date and time of birth
- Dam ID and sire ID (if known)
- Calf ID (ear tag number — tag immediately after birth before the cow gets protective)
- Birth weight (if scale available; estimate otherwise)
- Sex
- Calving ease score (1–5 scale: 1 = no assistance, 2 = slight pull, 3 = mechanical assistance, 4 = veterinary assistance, 5 = C-section)
- Colostrum source (dam nursing, tube-fed, replacer) and estimated amount
- Any treatments administered at birth (navel dip, antibiotic if dystocia)
Ear Tagging Tips
- Tag within the first hour of life, before the cow imprints on the calf's ear-tag-free scent.
- Place the tag in the middle third of the ear, avoiding the cartilage ridge and the blood vessels along the ear margin.
- Use a permanent marker or engraved tag number — ink on adhesive labels rubs off in winter mud. Two-tag system (one in each ear) prevents data loss if one tag is lost.
- Match calf tag number to dam record — a quick photo of dam, calf, and their respective tags on your phone is the easiest way to cross-reference.
Post-Calving Cow Care
The postpartum cow is vulnerable to several conditions that are easily missed in the chaos of calving season. Checking every cow 24–48 hours after calving can catch problems before they become crises.
Milk Fever (Hypocalcemia)
Milk fever typically occurs within 24–72 hours of calving as the cow's demand for calcium to produce milk outstrips her ability to mobilize dietary and skeletal reserves. High-producing dairy cows are most affected, but beef cows are not immune.
- Signs: Depression, weakness in hind limbs, difficulty rising, muscle tremors, cold extremities, subnormal temperature (<100°F), "S-bend" position of neck in severe cases.
- Treatment: IV calcium gluconate (500–1000 ml of 23% calcium gluconate solution), administered slowly and carefully — rapid IV calcium causes cardiac arrhythmias. This must be done by or under the guidance of a veterinarian unless you have received specific training. SQ calcium gels are used for mild cases and can be given by the owner.
- Prevention: DCAD (dietary cation-anion difference) diets in the dry period, adequate dietary magnesium, and oral calcium supplementation at calving in high-risk cows.
Grass Tetany (Hypomagnesemia)
Grass tetany occurs in lactating cows grazing lush pasture or cereal-grain forages in early spring, when magnesium absorption is poor. Affected cows show muscle tremors, incoordination, excitement or aggression, and can die within hours. Treatment requires IV magnesium (given by your vet). Prevention: magnesium supplementation (high-magnesium mineral blocks, magnesium oxide in mineral mix) starting 4–6 weeks before spring turnout.
Uterine Infections (Metritis)
Cows that had dystocia, retained placenta, or twins are at high risk for metritis in the first 10–14 days postpartum. Signs include purulent or red-brown foul-smelling vaginal discharge, fever, depression, and reduced milk production. Call your vet if you see these signs — systemic antibiotic treatment started early dramatically improves outcomes and shortens the time to first postpartum ovulation.
When to Call Your Large Animal Vet During Calving Season
Experienced stockmen develop good judgment about what they can handle themselves and what needs professional help. When in doubt, call — the cost of a farm call is always less than the cost of a calf or cow lost to a delayed intervention.
Call Immediately For:
- Cow has been in active stage 2 labor (visible straining, water sac or feet present) for more than 60 minutes with no progress
- Any abnormal presentation you cannot correct within 15–20 minutes
- Ringwomb (incomplete cervical dilation with approaching calf)
- Prolapsed uterus (the entire uterus inverted through the vulva — this is a true emergency; keep it clean, moist, and elevated in a towel while waiting)
- Cow down and unable to rise after calving (obturator nerve damage, hypocalcemia, or fracture)
- Suspected C-section (pelvic malformation in heifer, calf too large to deliver vaginally)
- Calf with suspected fractured limbs from assisted delivery
- Calf not breathing despite 5 minutes of resuscitation
- Calf with severe hypothermia (below 96°F rectal temp) not responding to warming within 30 minutes
- Postpartum cow with bloody vaginal discharge, high fever, or refusing to eat 24–48 hours after calving
Use FarmVetGuide's emergency large animal vet locator to find after-hours coverage, or browse your state's cattle vet directory to identify which practices offer emergency service. Having this information before calving season — not at 2 AM during a crisis — is the difference between a saved animal and a devastating loss. Also review How to Find a Large Animal Vet for tips on establishing an emergency vet relationship in rural areas where coverage can be limited.
Frequently Asked Questions About Calving Season
Q: How often should I check cows during calving season?
The standard recommendation for a compressed calving season (45–60 days) is to check cows every 2 hours around the clock during the peak of calving activity. At minimum, check every 4 hours. Night checks are not optional — calving happens disproportionately at night. Camera systems (Roper Technologies, CalfWatch, standard IP cameras with infrared capability) allow remote monitoring from a heated barn office or the farmhouse and dramatically reduce the number of physical checks needed during good weather. In cold weather (below 20°F with wind), increase check frequency to every 1–2 hours for any cow that appears close to calving.
Q: My first-calf heifer has been pushing for 2 hours with no progress — should I call the vet?
Yes, or at minimum you should perform a vaginal examination immediately to assess the situation. Two hours of active pushing in a heifer with no calf visible is beyond normal. Check for presentation — one foot back, head turned, ringwomb, or a calf too large for the pelvis are all possibilities. If you can correct the presentation and make progress within 15–20 minutes of obstetric work, proceed. If not, call your large animal vet. Every additional 30 minutes of delay increases calf mortality from hypoxia and increases maternal tissue damage from sustained pressure.
Q: When is it safe to remove a retained placenta manually?
Current veterinary consensus is that manual removal of retained placentas is contraindicated in most cases and should not be done by farm staff without specific instruction from your veterinarian. The caruncle-cotyledon attachment is vascular, and manual separation causes hemorrhage and endometrial damage that prolongs uterine recovery and delays return to estrus. If the placenta has not passed in 24 hours and the cow has a fever or is off feed, call your vet for medical management (oxytocin to improve uterine tone, antibiotics if indicated).
Q: How do I know if a calf got enough colostrum?
The most accurate field test is a total serum protein measurement using a Brix or clinical refractometer on a blood sample taken at 24–48 hours of age. Target: ≥5.5 g/dL total protein (corresponds to adequate passive transfer). Alternatively, many veterinary practices offer serum IgG testing (ELISA or radial immunodiffusion). Observationally, a calf that is bright, alert, standing well, and nursing eagerly by 4 hours of age almost certainly received adequate colostrum. A calf that is dull, weak, or showing signs of early infection in the first week of life should have passive transfer status assessed.
Q: What is the Sandhills Calving System and does it work?
The Sandhills Calving System (developed at the University of Nebraska) manages pathogen load during calving by continuously moving pregnant cows to fresh, clean ground and keeping young calves on separate pastures. Briefly: calving begins in a designated area; after 1–2 weeks, unCalved cows move to a new area while calves and their mothers stay behind. This prevents older calves (who are shedding scours pathogens) from contaminating the environment where neonates are born. Studies have shown dramatic reductions in scours incidence and calf mortality in large Nebraska cow-calf operations using this system. It requires adequate pasture area and perimeter fencing but is one of the highest-return management practices in cow-calf production.
Find a Vet by Species or Service